 |
| Starting supplies for this project. Mind you, there will be other supplies needed as this project evolves. |
 |
| Don't toss this out it can be used on the back of a canvas for a nice 'hook' to hang on wall! One of many ideas for this! |
 |
| Puncture hole so tip of craft knife will have a 'grabbing' point. |
 |
| While wearing gloves, carefully slice the top portion of can off. My work surface is a self healing cutting mat. Make sure to work slowly and safely. |
 |
| After top and bottom are removed and middle portion is cut in half. |
 |
| Remember all the recycled cardboard I cut up the other day... |
 |
| it comes in handy for many projects. |
 |
| Using two (different sized) square templates trace onto aluminium. I made my templates from recycled plastic traced from a quilting book. Make sure the squares will fit on aluminium. |
 |
| Using the smaller of the two squared, trace one and then cut from recycled cardboard. |
 |
| At this point you should have one large aluminium square one smaller aluminium square and one same size (smaller) square from cardboard. |
 |
| Trace smaller square pattern to back of larger square. |
 |
| Clip out/notch out corners of square with craft scissors. |
 |
| Tape cardboard square to printed side of aluminium square. |
 |
| Not this side but... |
 |
| like this. |
 |
| Now tape the smaller aluminium square (printed side) to the already taped down cardboard. |
 |
| It should look like this sandwich. |
 |
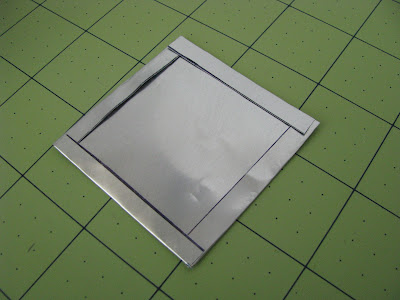
| While wearing gloves, fold over edges of the larger aluminuim square to the smaller side. |
 |
| Tap down for smooth fold. |
 |
| This is what it should look like after all four sides are folded and tapped down. |
 |
| What it looks like on the other side. |
 |
| On the left over cardboard and cutting mat poke holes with push pin. |
 |
| I use a ruler for more consistent alignment. |
 |
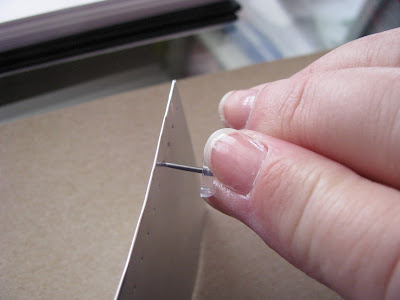
| At this stage simply poke through just a bit... |
 |
| It can be difficult to push through so I use a 'twisting' method... |
 |
| twisting to the left and then to the right... |
 |
| several times until pin pushes cleanly through. |
 |
| One first holes are made, I go back and while square is laying on cardboard flat, I insert push pin cleanly in till hole widens just a bit. |
 |
| After all holes are done. I'll finish up with this project later on but for now I'll leave off here. Check back tomorrow for the completed project... |


2 comments:
You have an impressive blog, Bairbre Aine. I appreciate how you are also focusing on green crafts this month. I look forward to seeing what is next and where this project is headed.
Thank you Bleubeard and Elizabeth, I really enjoy writing this blog. I love green crafts. Recycling is very important to me and upscaling just makes sense! I'm delayed due to family moving and being out of town allot. Will upload back post ASAP. Thank you for stopping by and for your kind comment. :)
Post a Comment